Blog Name

What's Mark Cooking?

Thursday, February 5, 2015

Crispy Skinned Chicken Breast

To complete a task successfully is to "nail it!"   We've all nailed it and not nailed it before.  To nail it or not nail it is sometimes intuitive and other times just plain obvious.  For example, back in the day, I used to compete in gymnastics.  My events were rings, parallel bars, and high bar.  In all three events, if I landed up-right, arms to my side, and in perfect balance on a dismount, I KNEW immediately that I nailed it.  Once I attempted a single fly-away dismount off the high bar.  I got the speed on the giant but let go of the bar too late resulting in a one and a half flip.  This landed me in a sitting position on the gym floor matt,  supported by both hands in back of me.  CRACK!!  I knew immediately I didn't nail it (unless you consider two shattered wrists and an entire summer in casts as nailing it).

So last night I tried a new recipe from America's Test Kitchen - Crispy Skinned Chicken Breast.  As I sat down with my wife to eat, I knew IMMEDIATELY that I nailed it.  How did I know?  First of all, three minutes into dinner, my wife was half-way through her portion.  Secondly, the skins were crispy.  I mean, Crispy with a capital "C."  You could almost hear the skins snap with each bite.  Even after adding pan sauce on top of the skin,  they were still crispy.  Third, the meat was tender and juicy.  I didn't sacrifice the inside for the outside.  Fourth, the sauce, which I rarely make, was fragrant, velvety, and had just the right amount of tanginess.  That, my readers, is what I call landing up-right, arms by my side, and in perfect balance.  I NAILED IT!!


You too can nail it with the following ingredients:
  • 2 boneless, chicken breasts with skin
  • Salt and pepper
  • 2 tbs vegetable oil (I used olive oil)
  • 1 minced shallot
  • 1 tsp flour
  • 1/2 cup chicken stock
  • 1/4 cup chopped pickled cherry peppers (I used the sweet variety)
  • 1/4 cup brine from the pickled cherry peppers
  • 1 tbs butter (I used unsalted)
  • 1 tsp minced fresh thyme
  • 1 12 inch sauce pan
  • 1 6 quart dutch oven lid (or other heavy object that will sit inside of sauce pan)
There are 2 tricks to this recipe.  The first is in the preparation of the chicken and the second is the use of a heavy object when cooking the chicken.  As you are about to see, neither requires brain surgery.

Preparing the chicken

Use a sharp knife and poke the skin of each breast.  The original America's Test Kitchen recipe calls for 30-40 pokes.  That's a lot of pokin'.  I stabbed 'em maybe 15 times on the skin side, flipped 'em over and pierced 'em again another 10 times.  Here's what mine looked like after all that defiling.


Once both sides were tortured with a sharp object,  I covered them with parchment paper and proceeded to pound them each 1/2 inch flat with a blunt force object.  I redeemed myself by lovingly sprinkling each breast with 1/2 tsp of salt, covering them with plastic wrap, and placing them in the refrigerator.  Keep 'em this way for between 1 to 8 hours.  The longer you keep them chilled, the more likely they will forget your indiscretions.

Cooking the chicken
  • Take the chicken out of the refrigerator and pat dry.
  • Sprinkle both sides of each breast with 1/4 tsp of pepper.
  • Ready for the first trick?  Place the vegetable oil in a 12 inch sauce pan or skillet and swirl until the entire surface is covered with an even amount of oil.  Note that the skillet, at this point, should not be hot.
  • Place the breasts skin side down in the oil.
  • Now, place the skillet over medium heat.
  • Place a heavy object on top of the chicken breasts.  I used the top of my 6 qt dutch oven.  I've heard others use a brick wrapped in foil.  The object just needs to be heavy enough to exert pressure on the breasts.
  • The oil will slowly heat up under the breasts and you may hear "popping" as the skin starts to crackle.
  • Cook the breasts for 7-9 minutes this way.  The skin will start to brown and the edges of the breasts will turn opaque.
  • Remove the weight and continue to cook skin side down for another 6-8 minutes.
  • Flip the breast, turn the heat down to medium-low, and cook meat side down for another 2-3 minutes.
  • You should now see your masterpiece taking shape as the skin will have turned brown and crispy.  You will be tempted to touch to confirm its crispness but take my word for it, from experience,  the chicken is hot and will burn your little cuticles if you touch.  In other words, NO TOUCHY!!
  • Remove both breasts from the pan to a separate plate, skin side up so you can still see your masterpiece.  The internal temperature should be between 160 and 165.  You can check if you don't believe me.  Limited touching is ok now :)
Pan sauce anyone?

If you've been following my blogs, good on you mates, thanks a lot.  But more to the point, you should know how easy it is to make a simple pan sauce.  We're going to do that again now.
  • Pour out all but about 2 tsp of oil from the sauce pan.
  • Turn the heat back up to medium.
  • Time to alchemize the party by adding in the the minced shallot and stirring for about 2 minutes until softened.
  • Thickening the mixture will provide further transformation and so we add flour and stir for up to a minute until the fully incorporated.
  • Continue the party by heating up to medium-high and adding the broth and brine.
  • With the liquid and the heat up, the party is cooking and your sauce should be simmering.  You can stir to scrape up those delicious brown bits on the bottom of the pan left by the chicken.
  • After 3 minutes or so, the party should be in full swing with the liquid thickened up a bit.  The stage is now all set to knock it out of the park.
  • Remove the pan from the heat, whisk in the butter, thyme, and chopped cherry peppers.
  • Taste with a spoon and add salt and pepper accordingly.
This sauce can be added on top of the chicken or you may want to plate the sauce first as a bed of gravy and add the chicken on top.   I ladled the nectar over half of each breasts and let it run down the sides.


NAILED IT!!

Friday, January 30, 2015

Turkey Breast In A Pot

When I tell people I’ve been to Paris, their first response is typically, "oh, as a foodie, you must have died and gone to heaven."   Well with all due respect to my friends, Parisian chefs, and Ben,  I've never been impressed.  I've been to Paris twice and never had what I would consider to be a great meal.  Sure, while there I've scarfed on awesome crepes walking home late at night, I've walked miles to bring those buttery and flaky croissants back to the rental apartment, and I've thoroughly enjoyed freshly baked afternoon baguettes with brie, rotisserie chicken and the prosciutto.  Hmmm, I guess the street food is pretty good after all :)

But never have I had one of those classic Parisian meals like I saw on 100 Foot Journey.  You know the meal I'm talking about, the michelin star'd meal that constantly has us foodies drooling over.  I just never experienced that type of gastronomy in Paris.  Could be that I’ve not gone to any of those restaurants.  Could be that it's all a myth.  But whatever.  The fact remains,  I’ve been to Paris twice and am still wearing my socks, daily!!

So what does all this have to do with WhatsMarkCooking?  Where is he going with all this?  Does he just want to moan and complain?  While it's true I like to moan and complain, that's not where I'm going.  Last night I found myself holding an in-bone turkey breast and wasn't quite sure how I wanted to cook it.  At first I thought...braise'er up.  I opened the fridge and there was no Guinness.  DOH!!  My bad.  Neither was there an open bottle of red wine to use.  Which isn't that surprising because in my house an open bottle of red wine is a rarity.  Well, that's not exactly true.  Open bottles of red wine are common but rarely do they actually contain wine after an hour or two. And NEVER would you find one the next day, opened, and not consumed. To be fair, there are a few UNopened bottle in our little wine fridge but they are earmarked for special occasions such as ENGAGEMENTS, WEDDINGS, and the birth of grandkids (hint, hint).

Anyway, so there I was, no braising liquids and a decent in-bone turkey breast in hand.  Now what? And again, how in the world does this relate to my rant about French food?  Soon.  Soon.

I next consulted the internet (why not?) and searched on braising.  One thing led to another and I found myself looking at a French technique called En Cocotte. Here’s what I read:

co·cotte /kôˈkôt,kəˈkät/ 
noun:
1. en cocotte a covered, heatproof dish or casserole in which food can be both cooked and served; a Dutch oven. 
2. a fashionable prostitute. 

I decided to focus on the first definition since I wasn't sure what my wife would think upon arriving home from work with a fashionable prostitute in the kitchen with me.  And so I set out on my big French Cooking Experiment!!  I decided to make:  Turkey Breast In A Pot.

Here's what I would need:
  • 1 Carrot
  • 1 Celery stalk
  • 1 Onion
  • Olive Oil
  • Aluminum Foil
  • 6 cloves of Garlic
  • 2 sprigs of Fresh Thyme
  • 1 Bay Leaf
  • 1 tbs Flour
  • 2-3 cups of Chicken Stock
  • In-Bone Turkey Breast (2.5 lbs)
  • Salt and Pepper
Here's how I did it:
  • Remove all but the lowest rack in the oven and preheat to 250 degrees.
  • Season both sides of turkey breast with salt and pepper.
  • Under a medium heat, place a few TBS of Olive Oil in a 6 quart dutch oven.
  • Once the oil is nice and hot, place the turkey breast in the pot

  • Brown all sides of the turkey breast in the dutch oven.  This should take at least 10 minutes.  Make sure all surface areas of the turkey breast is nice and browned.

  • While the turkey breast is browning, chop the carrots, celery, and onion.

  • Smash the garlic cloves with the flat end of a knife in order to release the oils. Remove the peels. Below you can see the cloves and peels separated along with the thyme and bay leaf

  • By the time your veggies are prepped, the turkey breast will most likely be browned so take it out of the dutch oven and place it on a plate.
  • With the turkey on a separate plate, add your carrots, celery, onion, and garlic cloves to the pot.  Stir and let them soften up for 5-10 minutes in the oil and turkey.
  • Next, add the thyme and bay leaf to the pot and stir for 1 additional minute.
  • Almost everyone is in the pool now and the party's should be rocking.
  • Take the pot off the heat and place the turkey breast back in, skin side up so that it is sitting on top of all those veggies.  Everyone's happy now!
  • Now comes the French part.  Cover the top of the dutch oven very tightly with aluminum foil.
  • Place the cover of the dutch oven on top over the aluminum foil.
  • Stick the whole party into the oven and set the timer for ONE HOUR.
  • After an hour, take the pot out of the oven and check the temperature of the turkey breast using a digital thermometer while making sure not to touch the bone with the thermometer. 

Turkey is good to eat at 160-165 degrees but remember, like all meat, you want to let it sit out for a bit before slicing in order for the juices to congeal IN the meat.  If you cut into it too soon, you lose all that precious juice.  Also remember that as the meat is sitting out, it still cooks a bit longer as well.  So my aim is to remove the turkey from the heat source at about 155 degrees.  This allows for 10-15 minutes of sitting time before it hits the correct temperature which is about the right time you need to make gravy.  If the temperature of the bird registers under 155 degrees when first removed from the oven, wrap the whole party back up tightly and place it back in the 250 degree oven for a bit longer.  Once at 155 degrees, your bird will be singing "tout est fait".  Remove it from its nest to a cutting board and "tent" it with aluminum foil.

Now we make gravy!!

I've always shy'd away from making gravy but trust me, once you make gravy using the following method, no longer will intimidation be part of your vocabulary.

With your bird removed its nest, the bottom of your dutch oven should contain veggies and juices.  Making gravy is completed in three steps; 1) concentrate the juices and veggie mixture, 2) add a thickener, 3) simmer until perfection is reached.  Here we go:  
  • Turn the heat up under the dutch oven to boil away the liquid.  This creates a concentration of juices and veggies and should take anywhere up to 10 minutes.
  • With the liquid all boiled out, your veggies are now ready to be thickened.  Turn down the heat to medium and sprinkle in 1 tbs of flour on top of the veggies.
  • Stir the veggies for three minutes.  The flour will adhere to the veggies.
  • Next, slowly whisk the chicken stock in to the thickened veggie mixture.
  • With all the stock whisked into the pot, the party is back in full swing. Continue to stir until there are no lumps left (another 5 minutes).
  • Add salt and pepper to taste and let the gravy simmer for yet another 5 minutes.

Now that the gravy is done, you can empty the contents into a gravy boat.  My gravy boat of choice is a battleship rather than some dainty little vessel because I like to keep all the veggies in the party and spoon it over my turkey.  All those broken down veggies taste great on top of turkey.  Other's like to pour the gravy through a strainer so that there are no veggies.  Party poopers!!

It's finally time to slice your bird.....


And serve!  We added a simple salad and steamed potatoes.


Well that's it for today from Rue du WhatsMarkCooking.  Au Revoir!

Saturday, January 24, 2015

Turkey Burgers and Roasted Cauliflower

Well I'm back. And I suppose you may be wondering, "What has Mark been cooking since his last blog?  Has he been cooking?  Has he been eating?  Is he hungry?   I hope he's not gone without food.  And what about his wife?  Is she starving?  Oh my, now I'm worried!!"

But fret not, we've been eating and I have been cooking.  Just nothing too interesting. I did some killer swordfish tacos that came out excellent but still needs some tuning.

I'm thinking for now, since I figured you're all worried about me eating and all, I'd go ahead and blog about last night's dinner just so you know everything's ok.

Last night was a typical "Mark" dinner.  Turkey burgers (still can't get my wife to eat beef), roasted cauliflower, and salad.  First a word about the salad.  And that word would be, "blech!!"  It was just a bunch-o-mixed-greens thrown into a serving bowl with grocery store bought dressing on the side.  Boring?  Definitely, no doubt about it.  To make matters worse, I even had da' kind home-made croutons from a previous day's drive to Gayle's in Capitola I could have thrown on top of the salad. But I didn't.  Those that know of Gayle's will approve, I'm sure, and those that don't know of Gayle's need to make a special trip to Capitola if for nothing else but to pay homage to this amazing coastal bakery.  I could have sliced a righteously ripe avocado which I also bought on that same drive to Gayle's and thrown that on top.  But I didn't.  I had a jar of roasted red peppers, I had carrots, I had celery, and well, you get the picture.  I could have thrown all those things in my salad. But I didn't.  I know, I failed "Intro to Salad 101" last night.  But in my excuse,  I wanted to concentrate on the roasted cauliflower and turkey burgers. Ya, that's the ticket, focus on the big picture and don't sweat the small stuff.

I admit that I'd rather have a nice juicy beef burger than a turkey burger. I mean, who wouldn't?  But given that beef is NOT on the menu tonight (and most other nights), I'm going to show you my approach to turkey resulting in a pretty awesome and somewhat healthier burger.  My hope is that you get the idea of how I make mine so that you can experiment on your own.  The roasted cauliflower on the other hand is just plain good and so easy to cook. It's a family favorite and if you have a proclivity towards cauliflower, I highly suggest you give this one a try. Special note: I have been asked by my oldest step-daughter to include a list of ingredients at the beginning of my blog and highlight them as they're used in the recipes. This tells me that my kids read my blog. Nice. Thank her if you like this approach. And if you don't, she's a Ph.D candidate in Physics and typically is always right. So there!!!

Turkey Burger Ingredients:
  • 3/4 pound ground turkey breast
  • 3/4 pound ground turkey thigh
  • 1 egg
  • 2 TBS Worcestershire sauce
  • 1/2 cup "dressing" 
  • 1 cup Panko crumbs
  • Salt and Pepper to taste
Cauliflower Ingredients:
  • 1 head cauliflower
  • Sesame Oil
  • Everyday Seasoning (or salt and pepper)
Let's start with the cauliflower since it is the easiest.  We are basically going to season the florets and roast them in a 425 degree oven for 20 minutes. Simple?  Here's step by step:
  1. Pre heat the oven to 425 degrees.
  2. Prepare the cauliflower:  I like to cut off the florets from the main cauliflower and slice them in half before rinsing.  That way, when I roast them, there is more of the floret exposed to the spices.
  3. Once rinsed, cover the entire area of a cookie pan with aluminum foil.  We will cook our florets on aluminum foil.  Why?  Because it makes clean up easy.  I mean really, could it BE any easier to crumble up and throw away, er...I mean, to recycle because after all, we are in California, right?
  4. Spray the aluminum foil with Pam or a little olive oil.  This will help to brown the bottoms of the florets.
  5. Place the florets on the aluminum foil.
  6. Sprinkle sesame oil on top of the florets.  You don't have to oil down every part of the floret since a little goes a long way.  But don't be shy either.  Nothing says, "party" to a floret like sesame oil.
  7. Once the florets are oiled up, time to season them.  I use Everyday Seasoning from Trader Joe's.  It contains sea salt, mustard seed, peppercorns, onion, garlic, paprika, and chili peppers.  It comes in a shaker with a built in grinder.  I have used the exact same seasonings individually as well when I didn't have the Everyday Seasoning available.  You can also just use salt and pepper if you have nothing.  You do need some seasoning along with the sesame oil so make sure to use something.
Here's what the cauliflower should look like before placing in the oven:


I like to throw the cauliflower in the oven as soon as I place the turkey burgers on the grill.  The burgers take about 10 minutes per side @ 350 degrees so by the time they are done, so is your cauliflower.  BOOM!  You are now a master of timing.

Next, the turkey burgers.
  • Combine the breast and thigh meat and mix well.  I have used just breast meat or just thigh meat before but I like a 50/50 mixture.  Breast meat has very little fat and will require you to use more "dressing".  Thigh meat alone results in a burger that just doesn't feel like a burger in your mouth.  I know that sounds weird but give it a try sometime and you'll see what I mean.  Trust me on this one and use a 50/50 mixture.
  • Add one egg and mix well
  • Add 2 TBS Worcestershire sauce and mix well
  • Add 1/2 cup "dressing" and mix well.  Ok, let talk about this so-called "dressing".  I use this ingredient to add flavor to the burger.  I have used all kinds of dressings such as "Drews Smoked Tomato" or "Ken's 1000 Island".   You can get as creative as you want at this point.  Ketchup?  Chili Sauce?  Minestrone soup?  Yup, I've tried the soup before as well.  Works great for meatloaf but not turkey burgers.  For this particular session, I used a Red Pepper sauce pictured below that I picked up from the farmers market.  There are bits of roasted red pepper in it which adds not only to the flavor but also provides some texture to the burger.
  • Add 1 cup Panko crumbs and mix well.  I use Panko rather than regular bread crumbs because again, they provide a little more texture and I also find that they soak up the "dressing" more providing structure to the burger without taking away the "dressing" flavor.

I grill the turkey burgers on my gas grill at 350 degrees.  Ten minutes per side.  In the past, I have placed the burgers directly on the grill but I find that they "stick" to the grill and I don't get the "crust" on the burgers that I like.  I like my burgers to have a "crust", as if they were cooked on a flat top.  The crust on the flat top is the result of carmelization of the fats and the meat.  Since there is much less fat in turkey meat, I have to produce the "crust" artificially.  I do that by using seasoning and grilling them on aluminum foil.  So once the burgers are prepared as above, I ready the foil to cook them on by spraying the foil with Pam.  Go heavy on the Pam for this.  

Once the foil is Pam'd up, divide the ground turkey into 6 patties, place the patties on the aluminum foil and use the Everyday Seasoning or Salt and Pepper to season the patties.  I season the patty on one side and then spray that side with Pam in order to glue the seasoning to the patty.  I repeat the same process on the other side of the patty.

Now, you have the patties seasoned, well Pam'd, and on the foil ready for grilling.   Here's what they should look like: 


Place the foil with the patties on the grill.  Cover the burgers if the grill has a cover.  Then put the cauliflower in the oven.  Flip the patties after 10 minutes.  Enjoy the smell of sesame oil as it wafts through the kitchen and into your mind driving the pets crazy.  After another 10 minutes, take the patties off the grill and the cauliflower out of the oven.

Make yourself a little salad...or not!!  

We usually eat turkey burgers without buns (so very carb conscious these days).  But last night, I put a slice of sharp cheddar cheese on mine for a minute before removing from the grill.  Even more decadent, we put our burgers on pretzel buns that were also slightly toasted.   I smeared the bun with a sriracha mayo on one side and chili infused ketchup on the other.  I took a snapshot without the buns so that there was no evidence of malfeasance.  By the way, this was very close to a healthy 30 minute meal.


I encourage you to try these two recipes and experiment with your own dressings in the burgers and let me know how they turn out.

Monday, January 12, 2015

Non-Cream Creamy Cauliflower Soup

I don't know about you but I'm constantly being pressured to cook healthy by my family. Their comments range from "you'll live longer" to "you look so much younger when you're thinner". But I think and hope that the real reason is they love my simple and natural approach to cooking.

I haven't always been a simple and natural cook. I use to be a simple and pre-packaged cook. And I LOVED it! I use to amaze my dates in college with what I now call homemade pre-packaged recipes. For instance, one of my signature dishes was a Mexican casserole that contained canned enchilada sauce, canned mushroom soup, canned olives, canned chiles, and canned salsa. From the plastic containers, I used cheese, tortillas (which I admittedly cut into triangles), and sour cream. I opened all the cans and threw them in my crock pot along with the cheese and tortillas. I would then brown a pound of ground beef and dump that in the pot as well. After 8 hours on low, I emptied the contents into a casserole dish, decorated the top of the dish with sour cream and pre-packaged guacamole. Finally I opened a bottle of BV wine and viola!! International date night! My roommates loved the leftovers (use to beat the heck out of the typical tuna and egg salad sandwiches we use to eat 3 nights a week for dinner) and my dates frequently were impressed. Of course I could never tell if it was the wine or the food that impressed them. Now, I know it was the wine.

But now I also know that I do impress my family with my simple and natural approach to cooking. How do I know that? Because they are constantly asking me for my recipes. Which takes us to today's blog - non-cream creamy cauliflower soup. This is a simple, natural, easy and fast cooking soup. Plus the leftovers, when there are any, can be used as a binder for casseroles which is handy for my ever conscience healthy family members. As a side note, it's almost all Paleo which seems to be a direction my cooking is taking my these days. I do use pre-packaged chicken stock because it is convenient. But in a later blog, I will make my version of chicken soup in which I will create my own stock. That stock can be used in this recipe, obviously.

For now, let's just dive into my "almost" paleo non-cream creamy cauliflower soup. For this batch, I used a medium cauliflower, 1 medium onion, 2 shallots, garlic, 3 cups of shitake mushrooms, salt and pepper to taste, and chicken stock. Omitted from the picture is apple cider vinegar which I used as an after thought. You'll see where it was used later in this blog.


The preparation for this soup is SUPER easy. Chop the onions and shallot and garlic (if you plan to use fresh garlic). I like using minced garlic from a bottle. Ok, so it is pre-packaged - old habits are hard to break but the ingredients are garlic and olive oil so what's the harm? Pretty simple. Anyway the veggies do not have to be chopped small because we are going to eventually blend the mixture. Once all participants are chopped, place your stock pot (I use a 6 quart cast iron dutch oven) on a medium high heat and throw in some olive oil to cover the bottom. I like to add 2 TBS of butter but don't tell that to my family (D'OH!!). Once the oil and butter are melted, dump the onions, shallots, and garlic in. Saute these veggies for 5 minutes or so until the onions, shallots and garlic are well infused with oil and starting to get soft.


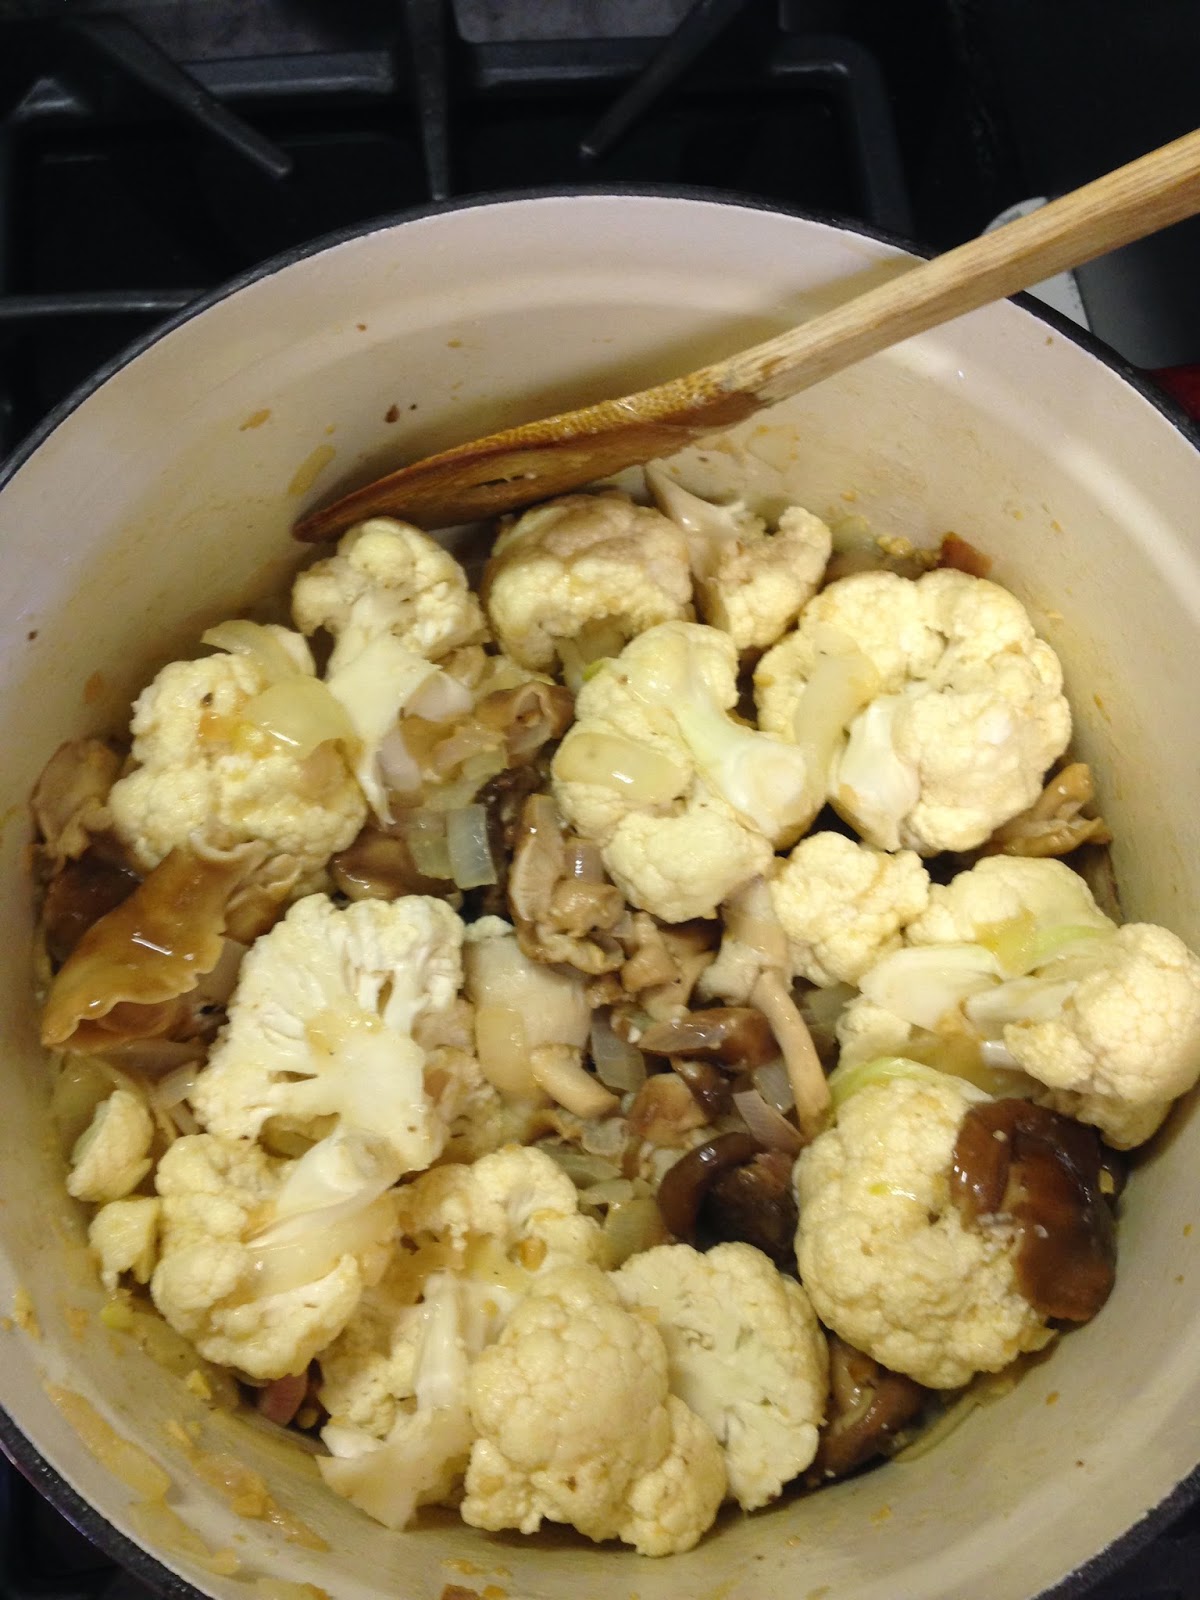
Once soft, throw in the shitake mushrooms, stir, and saute for another 5 minutes. Here is where I decided to add a few TBS of apple cider vinegar. I did this because the stock pot needed to be deglazed as I noticed some of the mushrooms and veggies decided to stick to the bottom. In hindsight, the apple cider vinegar added a bit of sweet tang to the soup. I'm glad I did this and encourage it as part of the recipe. But note that the soup will come out fine without it.


At this point, the veggies are nice and soft, the pot is deglazed, and it's time to throw in the main event - cauliflower. Preparation of the cauliflower is super easy as well. I used a medium cauliflower and after removing the leaves, I simply pulled off the flowerettes and rinsed them under water. Again, it doesn't matter how big they are or what shape they're in because eventually we are going to blend everything. So throw those bad boys on top of your veggies in the stock pot.


Next, stir the veggies with the cauliflower so that everyone in the pot is all oiled up. Now, you want to "saute" the cauliflower for 5 minutes or so in order to get a nice even coat of the saluted veggies on your cauliflower. This step seems a bit weird but take my word for it, spend 5 or 10 minutes and "stir the pot". The cauliflower will get all happy with your onions, shallots, garlic, shrooms, and apple cider vinegar. The longer you do this, the more infused the cauliflower will be. Once you feel everyone in the pot is nice and happy and ready to party, add some salt and pepper. I like a lot of pepper myself and not a lot of salt. But you will need to add them both. How much? Hmmm, I play it by ear and eye. I grind enough pepper so that each flower has a some pepper on it. I grind 1/4 amount of salt as I used pepper. For all you math and science types out there, that's a 1 to 4 ratio of salt to pepper. Nice?

Add enough stock so that everyone in the pool is swimming. Cover the pot and bring to a simmer for 15 minutes until the cauliflower is fork tender.


When fork tender, it is now time to blend. I scoop out the solids and fill the blender up about 3/4 of the way. Then I add the liquid so that all the veggies in the blender are once again covered with the happy juice.


You're almost home!! I pulse the mixture on/off for about 15 seconds in order to get the consistency I like. Your mileage may vary at this point. If you like chunkier soup, pulse less. If you like thinner soup, pulse more. Whatever you do, when you're happy with your consistency, pour the blended mixture into a large sauce pan. Repeat with the remainder of the solids and liquids from the original stock pot until everyones happy, blended, and in the sauce pan.


Me being a pepper guy, I like to now grind a little more pepper on top of the soup once in the sauce pan. You should turn the heat up on the sauce pan to medium after pepper is added and stir. You want the pepper IN the party, not just on the top. Once the soup is simmered, it is ready to serve. Spoon the soup in a cup or bowl and sprinkle a bit of chopped parsley and/or a squirt of pepper sauce on top to kick it up a notch if you like. Or not!! Enjoy!

Tuesday, January 6, 2015

Baby Back Time

Welcome back.   Last time we smoked beef back ribs and they came out amazing.  So I decided that as long as I got the smoker out, and I'm on a roll, why not do baby back pork ribs now.  I hope you're not thinking this is going to be a BBQ blog because it's not.  It is all about what I'm cooking at the moment and it just so happens that 1) I'm craving ribs (again), 2) weather is perfect for BBQ and, 3) cat's still out of the house.

First, a little background on me and pork ribs.  I am Jewish and so you may be asking why is a nice jewish boy smoking pork ribs?  Because they are - wait for it, AWESOMELY DELICIOUS!!  My parents, like a lot of jewish parents of their generation didn't eat "pork" even though they did occasionally cook and serve bacon.  My siblings and I never understood the logic behind "bacon is ok to eat but pulled port, spare ribs, pork chops are persona-non-grata in the Boronkay house."  But whatever, I like pork so I'm eating it.  And I'm still Jewish!!!

Which reminds me of a father/pork story...after my niece's bat-mitzvah, we all went to a vegetarian Chinese restaurant.  This was truly vegetarian.  No exceptions.  There was no meat served even though the dishes had names like "beef and broccoli" and "cashew chicken".   So half-way through the dinner, my brother turns to my dad and says, "Dad, have some of my sweet and sour pork, it taste just like pork!"  My dad, putting down his forkful of beef and broccoli says, "Are you kidding?  You know I don't eat pork.  I ain't eating no pork!"  Love you dad.

Anyway, now about pork ribs.  There are two types - baby backs and spare ribs.  The baby backs aren't as fatty as spare ribs, are smaller than spare ribs, and have their meat on top of the bone as opposed to spare ribs which hold a lot of meat in between the bones.  Personally, I'll eat either of them because they are - wait for it, AWESOMELY DELICIOUS - but when it comes to cooking/smoking, I prefer baby backs.  They're easier to prepare, take less time to cook, and they ALWAYS turn out great.   Plus the BBQ shows on TV are always using spare ribs so I figure, who knows...maybe someone at a network will read my blog, see how - wait for it, AWESOMELY DELICIOUS my baby backs are and will contact me to BBQ for my own TV show.

Probably not.

But maybe.

So let's get started!!

First, I like to use a dry rub on pork ribs as opposed to beef ribs where I only use salt and pepper.  I make my own dry rub and will show you just how easy it is to do.  Please don't think you need to make your own dry rub because there are some amazing dry rubs at your local grocery stores and specialty BBQ shops.  There are also incredible dry rubs on the internet.  Simply navigate to any BBQ site and you'll no doubt see them.  (There, my shameless plug to the BBQ sites for endorsements ;-)  But I make my own because I like my dry rub on the sweeter side rather than the saltier side.  A lot of the prepackaged dry rubs just have too much salt for me.  Here is my mantra for a basic dry rub:

"3 parts of brown sugar to 1 part of everything else except salt and pepper"

So on we go:
  • 3 TBS Brown Sugar
  • 1 TBS Sweet Paprika
  • 1 TBS Garlic Salt
  • 1 TBS Onion Salt
  • 1 TBS Chili Pepper
  • 1 TBS Cumin
  • Salt and Pepper to taste (if my reference is TBS as above, I may use 1 to 2 tsp of freshly ground black pepper and 1 tsp of freshly ground pink himalayan salt)

I dump all the above in container, shake, put a label on it, and viola!! The label is important so that when reaching for dry rub, you reach for the right container.  I learned that the hard way. I ruined a great batch of burgers once when I grilled them with what I thought was my dry rub but turned out to be a large container of chili powder.


Now that you have a spice container filled with your delicious rub, you are ready to prep the ribs.  The figure below on the left shows the bone side of the ribs.  You can see the shimmer of the membrane.  What you want to do first is to remove the membrane on the bone side of the ribs.  This allows the smoke to permeate the entire rib.  And it is easy to do!  Use a small hand towel as shown on the right below and grab the end of the membrane.  I start on the side with the smaller ribs.  


Then slowly pull down the entire length of the rib removing the majority of the membrane as shown on the left below. The image on the right below shows the entire rib rack after the membrane has been pulled off - I laid the membrane next to the rib rack so you can see what it looks like. You may need to go back and pull off the little pieces that broke off during the main pull.


With the membrane off, you are now ready to add the rub.  I apply a thin coat of plain yellow mustard to the rack first so that the rub will stick and not fall off as can be seen below on the left.  The mustard does not flavor the ribs at all.  It is mainly a glue to hold the rub in place. Once the mustard is applied, you can sprinkle the rub on.  I add a thin coat of rub making sure that all the mustard is covered.  With the bone side done, you can now flip the rack over and repeat on the meat side. Below on the right is what the rack should now look like.

Your rack is now prepped and ready for fire and smoke.  I used the Minion Method again and prepped my fire with ample pieces of cherry wood.  Then I placed the ribs on the top rack and covered the smoker


So with prep done and ribs in a covered smoker, it is now time for the hard part - THE WAIT!!  Pork baby back ribs take about 4 hours at 220-225 degrees.  Remember, this is the critical point where you are NOT SUPPOSED TO PEEK!  The only thing you should be doing is monitoring the temperature of the smoker.  I have an external temperature gauge that allows me to monitor the heat in the smoker.  When I see the temperature above 225, I close the vents at the bottom of the smoker..  When I see the temperature below 200, I open the vents part way.  And so it goes for four hours.  Experience will provide you with appropriate insight as to when and how much to open the vents.  This is both science and art.  The science part is dictated when you incorporate factors such as external wind, external temperature, amount of charcoals being used, etc..  The art part is dictated when you decided how much fruit wood to use, how much dry rub to apply, etc..

For this particular BBQ, I kept the temperature under 225 the entire four hours.  When I pulled the rack out of the smoker, here is what they looked like:


Not sure if you can see it or not, but upon slicing a rib off the rack, you can see the reddish smoke ring on the outside of the meat.  This BBQ was a total success and wait for it - AWESOMELY DELICIOUS!


I would have had a picture of me eating one of the ribs but I was alone for this BBQ and could not get my dogs to snap the picture.  Talk about ungrateful mutt's.  They were perfectly willing to snack on the ribs but refused to take my picture.  The Nerve!!

There you have it - perfectly BBQ'd pork baby back ribs.  Happy Eating!!