Blog Name

What's Mark Cooking?

Showing posts with label whatsmarkcookg. Show all posts

Friday, February 13, 2015

Tomatillo Chicken Soup

I went to school in San Diego at SDSU and for part of my first semester,  I lived in the dorm called "Zura Hall".  Most of us at "Zura" ate on meal plans that our parents purchased.  These plans provided unlimited access to "the commons" during the week which was an all-you-can-eat cafeteria with decent food like burgers, dogs, cold and hot cereal, eggs, salads, and assorted hot meals.  But it didn't quite matter where or what we ate, only that we ATE!  I mean really, I was living in San Diego with kindred spirits, unsupervised, and with limited responsibilities.  What more could I have asked for?  When I wanted something different, I crossed the street and ate at Blimpies or Jack-In-The-Box.

Now you may be asking why I was only at the dorm for part of the first semester.   The reasons are complicated but let's just say it was due to an involuntarily separation that involved me, my roommate, a towel shoved under the door preventing certain smells from drifting into the hallway,  and a particularly obnoxious resident assistant.  Moving off campus was just another rite of passage for us.  We settled a few miles away in a two-bedroom apartment in La Mesa for the remainder of the first semester and all of the second semester.  The good thing about "being asked to leave the dorm" was that all our friends from the dorm now had a place to come visit without any resident assistant hinderance.  The bad thing was that we were forced to start cooking for ourselves.  Neither the commons nor the grocery store were nearby.  Fortunately, my roommate had a car and we were able to do our own shopping when he wasn't out galavanting with his girlfriend.  Yet even with this down side, there I was, living in San Diego with kindred spirits, unsupervised with limited responsibilities.  Feed me anything, I'm good.

Don't let me misrepresent.  We weren't morally starved for good food.  We just didn't care.  We did dine five time that first year at nice restaurants.  Both sets of our parents came to visit and always took us out for nice dinners.   Also, I won a free dinner at a restaurant once for winning a talent show on an open mic night.  But truth be told, I stacked the deck by bringing most of my kindred spirits with me to clap.

The decision to move to the beach in our second year at SDSU was an easy one.  I mean seriously.  Beach of Inland?  No brainer, eh?  So we moved to Mission Beach.  That's when food started playing a bigger role for me.  We grilled burgers and butter fish on hibachi BBQs, cooked spaghetti and chili in crock pots, roasted chickens, and dress up tuna fish sandwiches.  And man, could we dress them up.   My roommate taught me how to add hard boiled eggs, scallions, and whatever else was in our refrigerator to a can of tuna.  More importantly, I learned about street Mexican food back then.

I learned that there were two types of Mexican food for college students in San Diego.  The first was in Mexico - the Tijuana (TJ) street vendor tacos.  We spent many weekends drinking cheap beer in Tijuana at the Long Bar.  By the end of the night, we found ourselves walking back to the US border.  This was always an important walk since it allowed us to sober up a bit and gave us a change to scarf on tacos sold on carts in the streets of TJ.   For $1.25, you could get three tacos.  They weren't big but they were OUTRAGEOUSLY good.  Ok, we were drunk but they were still great.  Three small tacos were never enough but we usually spent our dinero's on beer at the Long Bar keeping just $1.25 tucked away for street tacos.  That was the extent of weekend budgeting!

The other type of Mexican food in San Diego for us money challenged college students was fast food.  But not the Taco Bell or Super Taqueria you find on today's streets.  We had Roberto's and Umberto's and a host of other places with first names.  They were one-offs, not chains that sold amazing tacos and burritos.  I was into the rolled tacos (taquitos).   Yummy shredded beef rolled inside a corn tortilla about the diameter of a corona cigar.  They were deep fried, smothered in guacamole and topped with shredded Mexican cheese.  Three to an order.  They were a bit more than $1.25 but well worth it.  Oh man, I can taste 'em now.

In my years going to school and living in San Diego, I moved from Mission Beach to Pacific Beach to Point Loma to Ocean Beach and back to South Mission Beach tasting Mexican food every where I went.  One day I realized I had to grow up (another involuntary experience) and get a real job so I moved up to the Bay Area and lost that relationship with first-name Mexican joints.   And so I started cooking tacos and burritos myself.

Over the years, I've learned to cook many Mexican dishes.  I am particularly proud of my Tomatillo soup.  My family raves about it and I hope you will too.


Here's what you'll need:
  • 2-3 Chicken Breasts
  • 1 LB Tomatillos
  • 1 Onion
  • 3 Garlic cloves
  • 2 Jalapeno Peppers
  • 2 TBS Olive Oil
  • 3 Cups Chicken broth
  • Salt and Pepper
  • Chopped Cilantro
  • OPTIONAL:  Cayenne pepper
  • OPTIONAL: 2 Limes
There are four basic steps to this step that involve preparing the tomatillos, preparing the chicken breast, preparing the veggies, and finally putting it all together.

Prep and Broil Tomatillos
  • Set an oven rack about 7 inches from the heat and pre-heat on "Broil" setting
  • Peel off the husks of the tomatillos and rinse well with cold water.  I use large tomatillos to minimize the number I have to peel.  Below is what tomatillos look like with skins and without skins all cleaned up.
  • Cut the tomatillos in half and place them on a baking sheet covered with aluminum foil and sprayed with PAM
  • Place them under the broiler to char the skins.  It should take 7-9 minutes.  When they look like this, take them out.  They can sit on the aluminum foil until you need them.
Prep and Saute Chicken Breast
  • Season both chicken breast sides with salt and pepper.
  • Heat 2 TBS of olive oil in a sauce pan large enough to hold your chicken breasts. Saute for 5 minutes per side.  The oil needs to be hot in order to brown the sides.
  • Remove the chicken to a plate and adjust the fat in the sauce pan if needed in order to saute the veggies.
Prep and Saute Veggies
  • Chop the onion and garlic
  • Remove jalapeño pepper seeds and veins and chop.  You can leave them in if you like it spicy.
  • Add the veggies to the sauce pan with the chicken juices and olive oil.  Sauté for 10 minutes until softened and all the brown bits of the chicken are incorporated into the veggies.
  • Add the chicken broth and tomatillos. 
Putting It All Together
  • Nestle the chicken breasts in the sauce pan and simmer for 15 minutes until chicken is done but tender.  
  • Once the chicken is done, remove the breasts to a plate to let them cool down a bit. 
  • Remove the veggies and chicken broth from the heat and let cool for about 10 minutes.
  • When the veggies are cool, use a blender to coarsely chop them.  Depending on the size of your blender, this step will probably be done is stages.  Pour each blended mixture into another sauce pan over a medium heat.
  • By the time your blending is complete and the liquid is back into a pan, the chicken will be cool enough to touch.  Shred or chop into 1/2 inch cubes and place the pieces back in the pan.
  • Taste and adjust with salt and pepper.  If it's not spicy enough, you can add some cayenne pepper.  It if is not tangy enough, you can add lime juice.  Finally, garnish with fresh cilantro, open a beer, and enjoy!!

Thursday, February 5, 2015

Crispy Skinned Chicken Breast

To complete a task successfully is to "nail it!"   We've all nailed it and not nailed it before.  To nail it or not nail it is sometimes intuitive and other times just plain obvious.  For example, back in the day, I used to compete in gymnastics.  My events were rings, parallel bars, and high bar.  In all three events, if I landed up-right, arms to my side, and in perfect balance on a dismount, I KNEW immediately that I nailed it.  Once I attempted a single fly-away dismount off the high bar.  I got the speed on the giant but let go of the bar too late resulting in a one and a half flip.  This landed me in a sitting position on the gym floor matt,  supported by both hands in back of me.  CRACK!!  I knew immediately I didn't nail it (unless you consider two shattered wrists and an entire summer in casts as nailing it).

So last night I tried a new recipe from America's Test Kitchen - Crispy Skinned Chicken Breast.  As I sat down with my wife to eat, I knew IMMEDIATELY that I nailed it.  How did I know?  First of all, three minutes into dinner, my wife was half-way through her portion.  Secondly, the skins were crispy.  I mean, Crispy with a capital "C."  You could almost hear the skins snap with each bite.  Even after adding pan sauce on top of the skin,  they were still crispy.  Third, the meat was tender and juicy.  I didn't sacrifice the inside for the outside.  Fourth, the sauce, which I rarely make, was fragrant, velvety, and had just the right amount of tanginess.  That, my readers, is what I call landing up-right, arms by my side, and in perfect balance.  I NAILED IT!!


You too can nail it with the following ingredients:
  • 2 boneless, chicken breasts with skin
  • Salt and pepper
  • 2 tbs vegetable oil (I used olive oil)
  • 1 minced shallot
  • 1 tsp flour
  • 1/2 cup chicken stock
  • 1/4 cup chopped pickled cherry peppers (I used the sweet variety)
  • 1/4 cup brine from the pickled cherry peppers
  • 1 tbs butter (I used unsalted)
  • 1 tsp minced fresh thyme
  • 1 12 inch sauce pan
  • 1 6 quart dutch oven lid (or other heavy object that will sit inside of sauce pan)
There are 2 tricks to this recipe.  The first is in the preparation of the chicken and the second is the use of a heavy object when cooking the chicken.  As you are about to see, neither requires brain surgery.

Preparing the chicken

Use a sharp knife and poke the skin of each breast.  The original America's Test Kitchen recipe calls for 30-40 pokes.  That's a lot of pokin'.  I stabbed 'em maybe 15 times on the skin side, flipped 'em over and pierced 'em again another 10 times.  Here's what mine looked like after all that defiling.


Once both sides were tortured with a sharp object,  I covered them with parchment paper and proceeded to pound them each 1/2 inch flat with a blunt force object.  I redeemed myself by lovingly sprinkling each breast with 1/2 tsp of salt, covering them with plastic wrap, and placing them in the refrigerator.  Keep 'em this way for between 1 to 8 hours.  The longer you keep them chilled, the more likely they will forget your indiscretions.

Cooking the chicken
  • Take the chicken out of the refrigerator and pat dry.
  • Sprinkle both sides of each breast with 1/4 tsp of pepper.
  • Ready for the first trick?  Place the vegetable oil in a 12 inch sauce pan or skillet and swirl until the entire surface is covered with an even amount of oil.  Note that the skillet, at this point, should not be hot.
  • Place the breasts skin side down in the oil.
  • Now, place the skillet over medium heat.
  • Place a heavy object on top of the chicken breasts.  I used the top of my 6 qt dutch oven.  I've heard others use a brick wrapped in foil.  The object just needs to be heavy enough to exert pressure on the breasts.
  • The oil will slowly heat up under the breasts and you may hear "popping" as the skin starts to crackle.
  • Cook the breasts for 7-9 minutes this way.  The skin will start to brown and the edges of the breasts will turn opaque.
  • Remove the weight and continue to cook skin side down for another 6-8 minutes.
  • Flip the breast, turn the heat down to medium-low, and cook meat side down for another 2-3 minutes.
  • You should now see your masterpiece taking shape as the skin will have turned brown and crispy.  You will be tempted to touch to confirm its crispness but take my word for it, from experience,  the chicken is hot and will burn your little cuticles if you touch.  In other words, NO TOUCHY!!
  • Remove both breasts from the pan to a separate plate, skin side up so you can still see your masterpiece.  The internal temperature should be between 160 and 165.  You can check if you don't believe me.  Limited touching is ok now :)
Pan sauce anyone?

If you've been following my blogs, good on you mates, thanks a lot.  But more to the point, you should know how easy it is to make a simple pan sauce.  We're going to do that again now.
  • Pour out all but about 2 tsp of oil from the sauce pan.
  • Turn the heat back up to medium.
  • Time to alchemize the party by adding in the the minced shallot and stirring for about 2 minutes until softened.
  • Thickening the mixture will provide further transformation and so we add flour and stir for up to a minute until the fully incorporated.
  • Continue the party by heating up to medium-high and adding the broth and brine.
  • With the liquid and the heat up, the party is cooking and your sauce should be simmering.  You can stir to scrape up those delicious brown bits on the bottom of the pan left by the chicken.
  • After 3 minutes or so, the party should be in full swing with the liquid thickened up a bit.  The stage is now all set to knock it out of the park.
  • Remove the pan from the heat, whisk in the butter, thyme, and chopped cherry peppers.
  • Taste with a spoon and add salt and pepper accordingly.
This sauce can be added on top of the chicken or you may want to plate the sauce first as a bed of gravy and add the chicken on top.   I ladled the nectar over half of each breasts and let it run down the sides.


NAILED IT!!

Monday, January 12, 2015

Non-Cream Creamy Cauliflower Soup

I don't know about you but I'm constantly being pressured to cook healthy by my family. Their comments range from "you'll live longer" to "you look so much younger when you're thinner". But I think and hope that the real reason is they love my simple and natural approach to cooking.

I haven't always been a simple and natural cook. I use to be a simple and pre-packaged cook. And I LOVED it! I use to amaze my dates in college with what I now call homemade pre-packaged recipes. For instance, one of my signature dishes was a Mexican casserole that contained canned enchilada sauce, canned mushroom soup, canned olives, canned chiles, and canned salsa. From the plastic containers, I used cheese, tortillas (which I admittedly cut into triangles), and sour cream. I opened all the cans and threw them in my crock pot along with the cheese and tortillas. I would then brown a pound of ground beef and dump that in the pot as well. After 8 hours on low, I emptied the contents into a casserole dish, decorated the top of the dish with sour cream and pre-packaged guacamole. Finally I opened a bottle of BV wine and viola!! International date night! My roommates loved the leftovers (use to beat the heck out of the typical tuna and egg salad sandwiches we use to eat 3 nights a week for dinner) and my dates frequently were impressed. Of course I could never tell if it was the wine or the food that impressed them. Now, I know it was the wine.

But now I also know that I do impress my family with my simple and natural approach to cooking. How do I know that? Because they are constantly asking me for my recipes. Which takes us to today's blog - non-cream creamy cauliflower soup. This is a simple, natural, easy and fast cooking soup. Plus the leftovers, when there are any, can be used as a binder for casseroles which is handy for my ever conscience healthy family members. As a side note, it's almost all Paleo which seems to be a direction my cooking is taking my these days. I do use pre-packaged chicken stock because it is convenient. But in a later blog, I will make my version of chicken soup in which I will create my own stock. That stock can be used in this recipe, obviously.

For now, let's just dive into my "almost" paleo non-cream creamy cauliflower soup. For this batch, I used a medium cauliflower, 1 medium onion, 2 shallots, garlic, 3 cups of shitake mushrooms, salt and pepper to taste, and chicken stock. Omitted from the picture is apple cider vinegar which I used as an after thought. You'll see where it was used later in this blog.


The preparation for this soup is SUPER easy. Chop the onions and shallot and garlic (if you plan to use fresh garlic). I like using minced garlic from a bottle. Ok, so it is pre-packaged - old habits are hard to break but the ingredients are garlic and olive oil so what's the harm? Pretty simple. Anyway the veggies do not have to be chopped small because we are going to eventually blend the mixture. Once all participants are chopped, place your stock pot (I use a 6 quart cast iron dutch oven) on a medium high heat and throw in some olive oil to cover the bottom. I like to add 2 TBS of butter but don't tell that to my family (D'OH!!). Once the oil and butter are melted, dump the onions, shallots, and garlic in. Saute these veggies for 5 minutes or so until the onions, shallots and garlic are well infused with oil and starting to get soft.


Once soft, throw in the shitake mushrooms, stir, and saute for another 5 minutes. Here is where I decided to add a few TBS of apple cider vinegar. I did this because the stock pot needed to be deglazed as I noticed some of the mushrooms and veggies decided to stick to the bottom. In hindsight, the apple cider vinegar added a bit of sweet tang to the soup. I'm glad I did this and encourage it as part of the recipe. But note that the soup will come out fine without it.


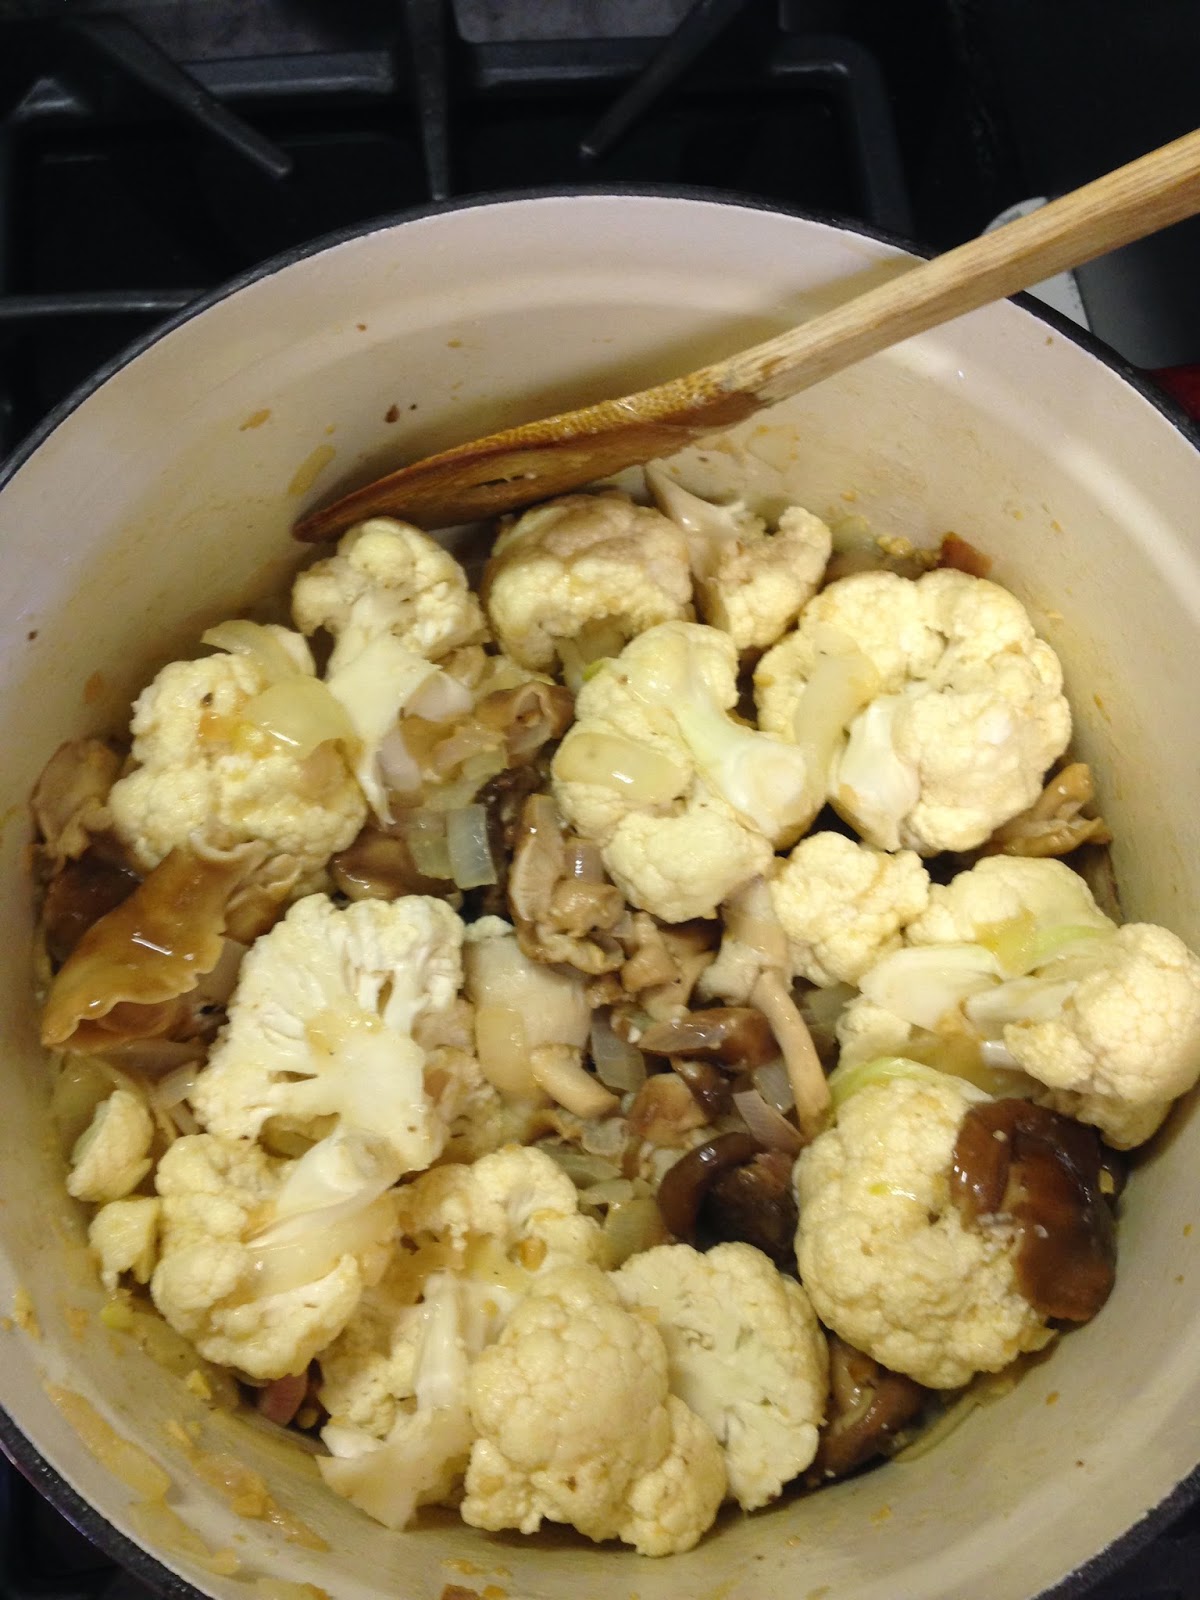
At this point, the veggies are nice and soft, the pot is deglazed, and it's time to throw in the main event - cauliflower. Preparation of the cauliflower is super easy as well. I used a medium cauliflower and after removing the leaves, I simply pulled off the flowerettes and rinsed them under water. Again, it doesn't matter how big they are or what shape they're in because eventually we are going to blend everything. So throw those bad boys on top of your veggies in the stock pot.


Next, stir the veggies with the cauliflower so that everyone in the pot is all oiled up. Now, you want to "saute" the cauliflower for 5 minutes or so in order to get a nice even coat of the saluted veggies on your cauliflower. This step seems a bit weird but take my word for it, spend 5 or 10 minutes and "stir the pot". The cauliflower will get all happy with your onions, shallots, garlic, shrooms, and apple cider vinegar. The longer you do this, the more infused the cauliflower will be. Once you feel everyone in the pot is nice and happy and ready to party, add some salt and pepper. I like a lot of pepper myself and not a lot of salt. But you will need to add them both. How much? Hmmm, I play it by ear and eye. I grind enough pepper so that each flower has a some pepper on it. I grind 1/4 amount of salt as I used pepper. For all you math and science types out there, that's a 1 to 4 ratio of salt to pepper. Nice?

Add enough stock so that everyone in the pool is swimming. Cover the pot and bring to a simmer for 15 minutes until the cauliflower is fork tender.


When fork tender, it is now time to blend. I scoop out the solids and fill the blender up about 3/4 of the way. Then I add the liquid so that all the veggies in the blender are once again covered with the happy juice.


You're almost home!! I pulse the mixture on/off for about 15 seconds in order to get the consistency I like. Your mileage may vary at this point. If you like chunkier soup, pulse less. If you like thinner soup, pulse more. Whatever you do, when you're happy with your consistency, pour the blended mixture into a large sauce pan. Repeat with the remainder of the solids and liquids from the original stock pot until everyones happy, blended, and in the sauce pan.


Me being a pepper guy, I like to now grind a little more pepper on top of the soup once in the sauce pan. You should turn the heat up on the sauce pan to medium after pepper is added and stir. You want the pepper IN the party, not just on the top. Once the soup is simmered, it is ready to serve. Spoon the soup in a cup or bowl and sprinkle a bit of chopped parsley and/or a squirt of pepper sauce on top to kick it up a notch if you like. Or not!! Enjoy!